Common operations
This topic includes some common operations explained with an example:
 Filtering data
A drop-down  option is provided in TruCap+ to filter data to choose only specific results to view. You can select particular checkboxes to view only particular results.
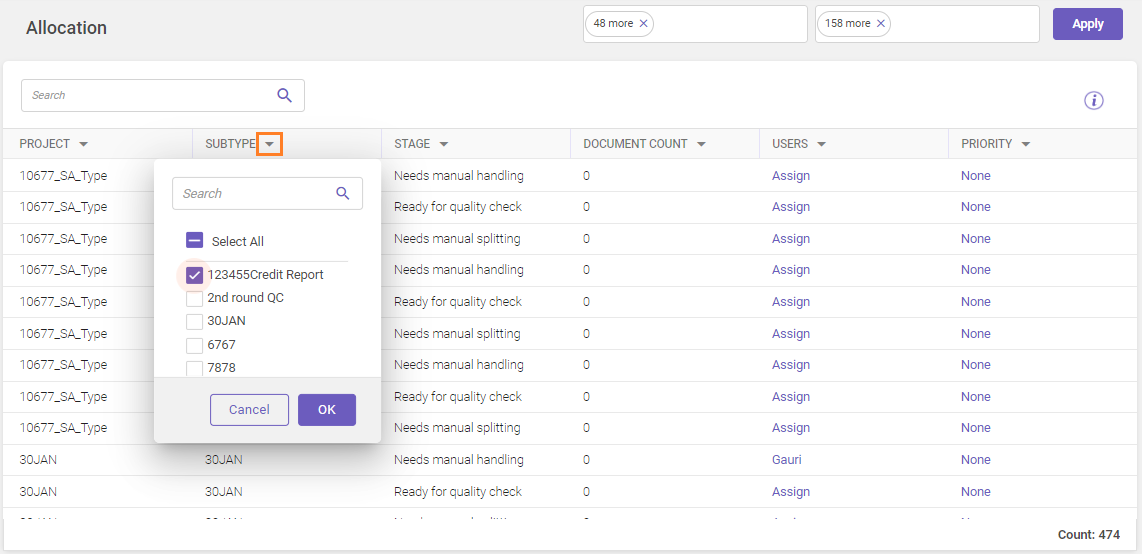
The following is an example of the Allocation page; it shows the steps to use the filter option on the page. Using the same method, you can also use the filter option available on other menu pages.
For example,
To filter the Allocation details and view the details of only the selected input.
-
Click the
 drop-down arrow available next to the column header. A pop-up list with all the available input details is displayed.

-
Select the required checkbox, and then click OK.
Searching data
In TruCap+, the search feature enables you to search any record by entering the text relevant to the column names.
For example,
-
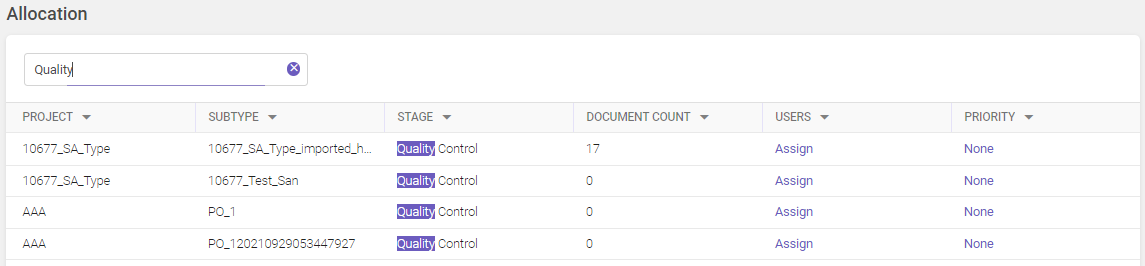
On the Allocation page, to search an allocation record by stage name, enter the stage name in the Search field on upper-left corner of the page and then press Enter.
-
You can also search records by Type, subtype, Document count, Users, and Priority name.
 Sorting columns
In TruCap+, you can sort the records into an ascending or descending order based on your requirement. Using the  ascending and
 descending icons on the column header, you can sort the records.
For example,
-
On the User Management page, on the header row, click the USERNAME column name, to sort the sequence of records available in the list. Similarly you can sort records of any column into ascending or descending order.
Following screen displays records in an ascending order:
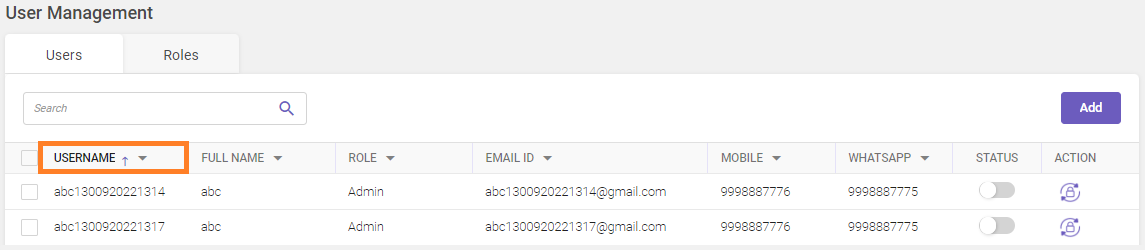
Following screen displays records in descending order:

Using edit function
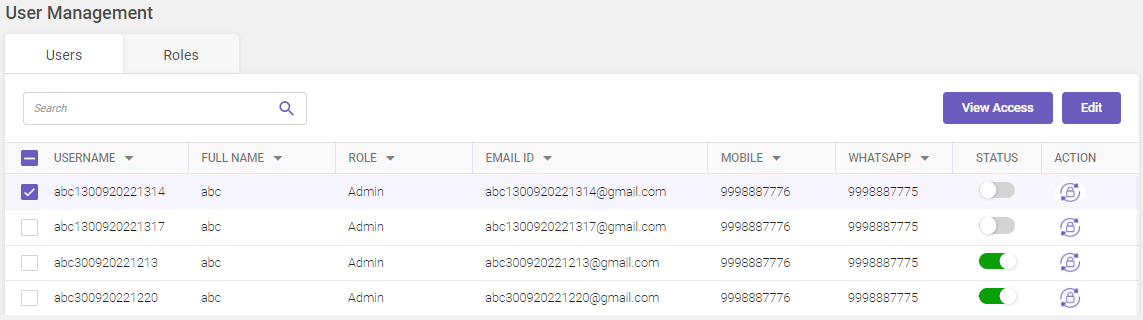
As an Administrator/User, you can modify the once added details when you select the record—the Add button changes to Edit button.
The steps to edit details mentioned here are common.
For example,
-
On the User Management page, select the required user. Once you select the user the Add button changes to Edit button
-
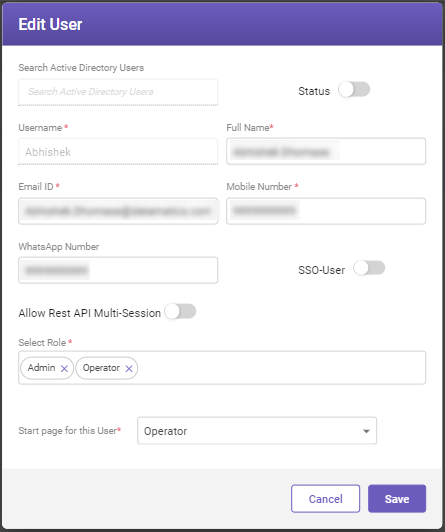
Click Edit. The Edit User window opens.

-
Modify the required details and then click Save.
Understanding icons
Following is the list of commonly used icons in TruCap+.
|
ICON |
DESCRIPTION |
|---|---|
|
|
Drop-down arrow |
|
|
Bell icon |
|
|
Calendar icon |
|
|
Toggle switch in turn on/active mode. |
|
|
Toggle switch in turn off/inactive mode. |
|
|
Reset password |
|
|
Icon is used to arrange records in an ascending order |
|
|
Icon is used to arrange records in descending order |


 Logging in to a different account
Click Sign in using different Account to login into TruCap+ with different account.
Forgot password
To retrieve or reset the password, proceed as follows:
-
Click Forgot Password?. The Confirm Details window opens.

Fill-in the details based on the following field descriptions.
FIELD
DESCRIPTION
Username*
Enter the username associated with your account.
Email Id*
Enter the email Id on which you want to receive the reset password.
-
Click Submit. The username and a new reset password will be sent to the email address provided; use the new password to log in to TruCap+. Upon logging in with the new password, a Change Password window will appear. Here, you can set a new password of your choice.
 Setting up profile
Setting up your user profile in TruCap+ is a simple process that allows you to customize your account information according to your preferences.
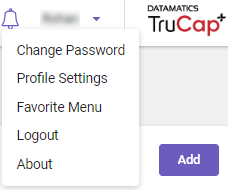
To setup profile
To set up the user profile, follow these steps:
-
In the top-right corner of TruCap+, click the
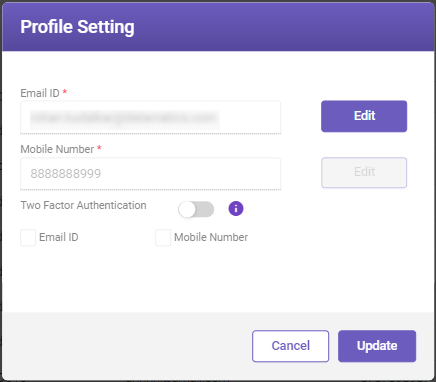
 drop-down arrow, go to Profile Settings option. The Profile Setting window opens.

Refer the table below to know about the settings available.
SETTING
DESCRIPTION
Email ID*
Displays the registered email id.
Mobile Number*
Displays the registered mobile number.
Two Factor Authentication
Turn on the toggle button to enable two-factor authentication, wherein an OTP is sent to the registered email/mobile, which you must enter at the time of login.
Select either Email ID or Mobile Number or both for receiving an OTP.
*Mandatory fields
Editing profile
User can update the registered email id and mobile number.
-
In the top-right corner of the TruCap+, click the
 drop-down arrow, go to Profile Settings option. The Profile Setting window opens.
-
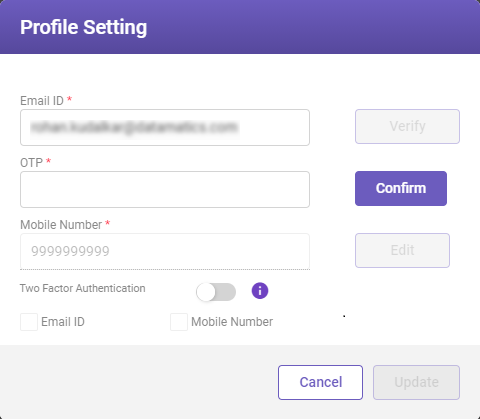
To update the email id, click Edit. The following window opens. Enter the new email address or update the current email id in the Email ID field.

-
Click Verify to verify the updated email id. The following window opens.

-
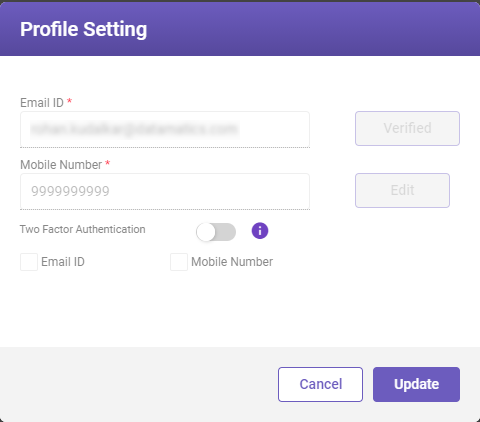
Enter the OTP sent to the updated email id and click Confirm. The following window opens.

-
Click Update to update the details.

Note:
Similarly a user can also edit the mobile number.
Favorite menu
TruCap+ offers the convenience of setting up your favorite menus, allowing you to easily access the features you frequently use. This feature streamlines your workflow and enhances your user experience.
To setup favorite menus
To set up the favorite menu, follow these steps:
-
In the top-right corner of TruCap+, click the
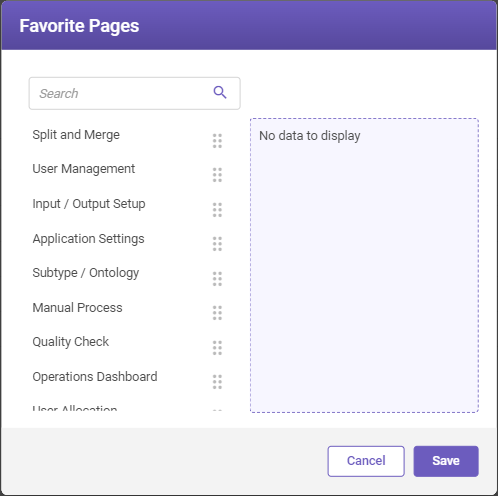
drop-down arrow, go to Favorite Menu option. The Favorite Pages window opens.
-
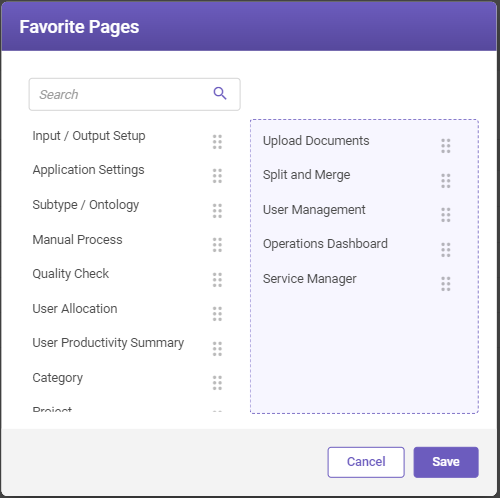
To set up your favorite menus, drag the required menu card using
 from the left pane on to the right pane and click Save. Utilize the search box if you need to search for a specific menu.

Note:
You can also change the sequence of the selected menus as per your requirement using the
icon by dragging the selected menus up and down. -
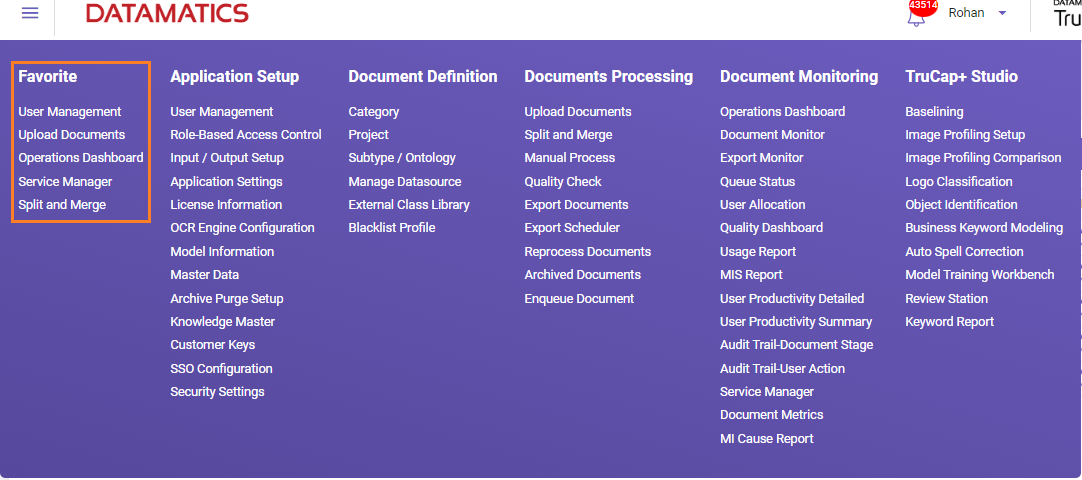
Once you have selected your favorite menus, click Save. The favorite menus are successfully saved and visible in the main menu (see below image).

Note:
-
To remove a favorite menu from the list, click the Favorite Menu option (see step 1) and drag the required menu card to be removed from the list using
icon from the right pane to the left pane and click Save. The selected menu item is removed from the list. -
The favorite menu list is restricted to 10 menu options.
Changing password
To change the TruCap+ login password, follow these steps:
To change password
-
In the top-right corner of TruCap+ page, click the
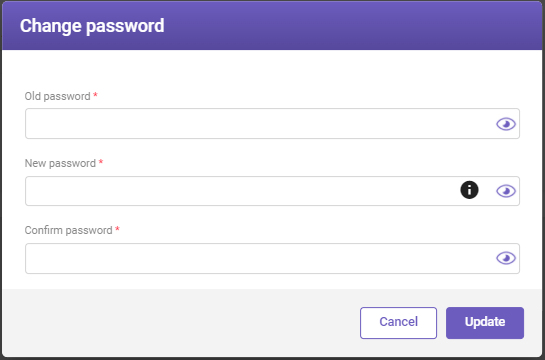
drop-down arrow and go to Change Password. The Change password window opens.
-
Fill-in the details based on the following field descriptions.
FIELD
DESCRIPTION
Old password*
Enter the existing password.
New Password*
Enter the new password.
Note
-
Password must be a combination of at least one lowercase and uppercase characters, at least one digit and one special character.
-
Password must contain at least minimum of 11 and maximum of 14 characters.
Confirm Password*
Re-enter the password as specified in the New password field.
* Mandatory fields
-
About TruCap+
To know details about the currently installed application and database versions of TruCap+, follow these steps:
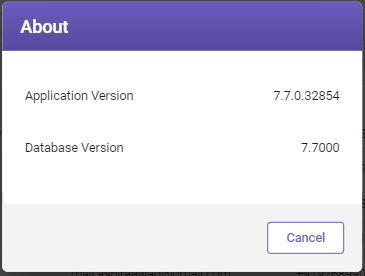
In the top-right corner of TruCap+ page, click the drop-down arrow and go to About. The About window opens. It will provide you with essential details such as the currently installed application version, database version, and patch id (if available) of TruCap+.